Davinci Resolve 17 Intro to Custom Scripting
This video covers an introduction to scripting in Davinci Resolve 17. This series will be expanded to include intermediate and more advanced scripting details for Resolve Fusion. In this example, I walk through how to take a Fusion composition and export it to a custom template. There are important steps on how the script is saved in order to setup the controls for the script that will be exposed in the Inspector. I show how to access the saved script using a text editor. Then how to add a custom message in the script that provides instructions to the users right in the inspector. The control settings are explained including how to add custom names to the controls. Then I show how to add this script to your Titles menu in the Edit Page so you can preview your template script before adding it to your timeline. Once all the scripting is complete, your exposed controls allow users to use the script without having to visit the Fusion page.
Typical Code for a Fusion Node
| # | Script |
|---|---|
| 1 | sMerge1 = sMerge { |
| 2 | Inputs = { |
| 3 | Input1 = Input { |
| 4 | SourceOp = "sEllipse1", |
| 5 | Source = "Output", |
| 6 | Input2 = Input { |
| 7 | SourceOp = "sEllipse2", |
| 8 | Source = "Output", |
| 9 | }, |
| 10 | Comments = Input { Value = "DVS-3D Rings V1.0\nAdjust No. of Rings, Ring Spacing, Colors and Glow", }, |
| 11 | }, |
| 12 | ViewInfo = OperatorInfo { Pos = { 220, 82.5 } }, |
| 13 | }, |
Breaking the script down. Line 1 identifies the type of Node and its name (Shape Merge Node - sMerge1).
| 1 | sMerge1 = sMerge { |
|---|
The Shape merge has two inputs that are being merged. These are both shape nodes. Lines 4 and 7 identify the names of the Shape nodes: sEllipse1 and sEllipse2. The source of the input into the sMerge is the output connections from the sEllipse shapes as identified in lines 5 and 8.
Line 10 is where I have used the sMerge1 node to add comments to the dialog box in the inspector. This really is the only purpose for this node in terms of customizing the script. I wanted to add some comments that let me know which version of the 3D Rings Tunnel effect I have and the properties that can be adjusted (no. of rings, ring spacing, etc.). Note that the \n in the script adds a forced line break in the text.
| 10 | Comments = Input { Value = "DVS-3D Rings V1.0\nAdjust No. of Rings, Ring Spacing, Colors and Glow", }, |
|---|
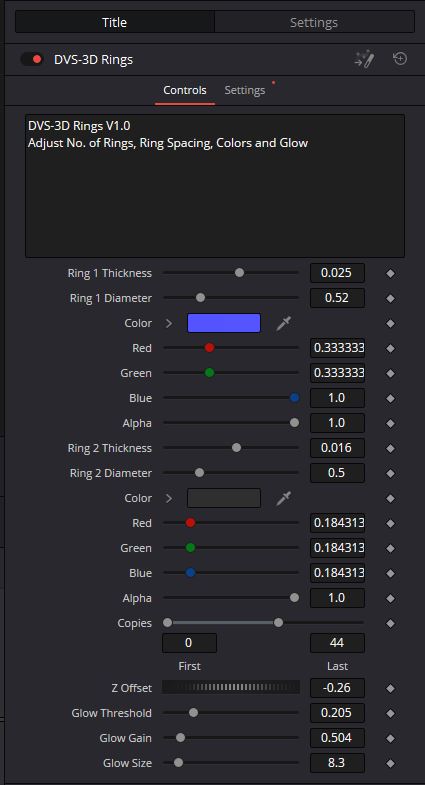
The finished template created during this video can be downloaded from my Buymeacoffee Page here:
https://www.buymeacoffee.com/DVectorStudios/free-3d-ring-tunnel-template

